Jim's Self Storage units in Williamstown
How to store a fridge
Articles

How To Store A Fridge With This 6-Step Plan

How to store a fridge

Need to store some items that are worth quite a bit of money? If it’s jewellery, many furniture types, and even artwork, musical instruments and electronics, you don’t need to stress too much – or at all – about how they’re securely stashed away. But what about storing a fridge? Not understanding how to store a fridge properly can really come back to bite you – and cost you a lot of money when you need to replace the damaged or destroyed one.

Do you have a refrigerator storage plan?

Was your plan to lay the fridge flat on its side, exposed to extreme temperatures, without any restraints or support, with other heavy storage boxes sitting on top of it? Sure, it’s an extreme example of refrigerator store malpractice, but even one or two fridge storage mistakes can still result in:

  • Damage to the fridge itself
  • Damage to the compressors/condensers
  • Reduced energy efficiency/performance
  • Inconsistent cooling leading to food spoilage
  • Accelerated wear & tear
  • Safety hazards due to malfunctioning fridge.

So how exactly do you store a fridge properly to keep it working properly and optimally for years to come even after a long period of not even plugging it in? It’s as easy as following our ultimate 6-step guide:

1. Clean & dry

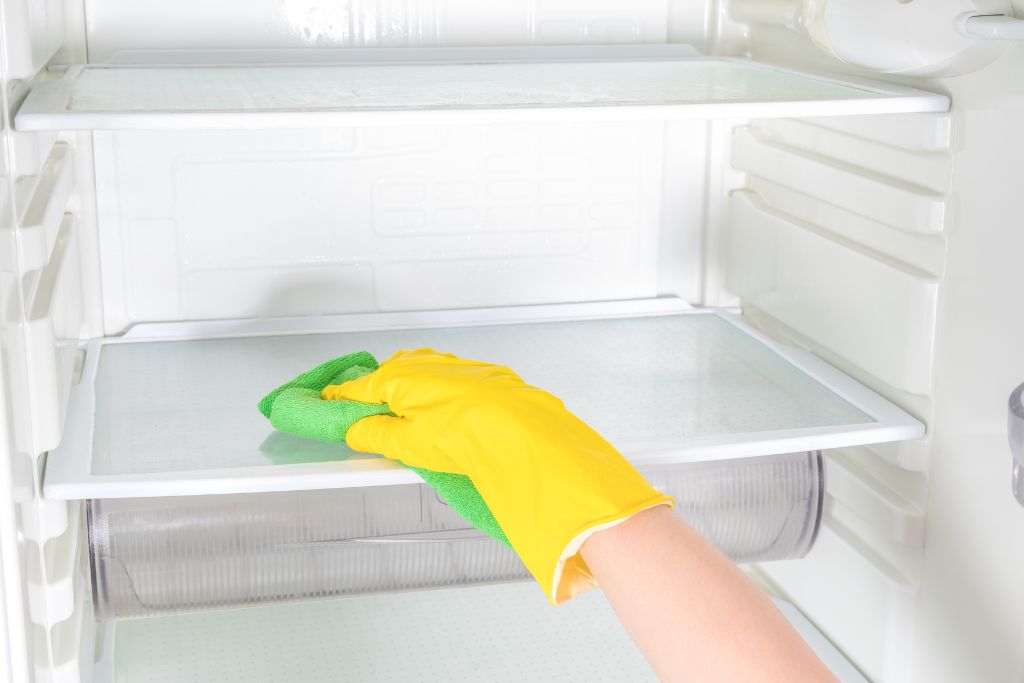
After you empty out the milk, cheese and last night’s leftovers, you’re going to have to use some elbow grease. All you need is a mild detergent and warm water, but first, pull out the removable shelves and drawers and clean them separately before giving absolutely everything a thorough scrub from top to bottom – and don’t forget to dry it all off afterwards.

WHAT IF YOU DON’T?: You’re risking smells, the growth of mould & mildew, pest infestations and a disgusting, caked-on mess that will ensure your fridge is never the same again.

2. Defrost

Don’t forget, your fridge also has a freezer – and it will need to be completely and thoroughly defrosted prior to it going into storage. If you leave that ice build-up behind, the cooling system can get damaged as it thaws.

WHAT IF YOU DON’T?: You’re risking a damaged cooling system, water leakage, mould growth and a generally broken fridge.

3. Secure the doors

It doesn’t really matter how you secure those doors closed – use tape, rope, door straps, whatever you fancy. Just as long as those doors won’t swing open at any time when you don’t want them to – especially on the trip to the storage facility.

WHAT IF YOU DON’T?: You could end up with damaged doors, hinges and seals.

4. Keep it upright

Have you ever known someone who thinks it’s ok to store a fridge on its back or side? Well, they’re 100% wrong, because even on a short road trip – and especially in short or long-term storage – you’re almost guaranteed to damage the cooling system and maybe even several other internal components apart from the compressor.

WHAT IF YOU DON’T?: Expect coolant leaks, impaired fridge functionality, costly repairs or total fridge failure.

5. Control the storage space

Now that your fridge is clean, and defrosted, the doors are secured and it’s upright, you’ll need a suitable place to store it. Make sure wherever you’re putting it is not humid, well ventilated and with as stable a temperature as possible – nothing below 10°C or higher than 29°C if at all possible.

WHAT IF YOU DON’T?: You’re simply risking damage to your fridge’s reliability, components and cooling capacity, including increased energy consumption and even electrical safety hazards once it’s switched back on.

6. Give it space

We mentioned ample ventilation in Step #5, and that doesn’t just go for the storage area in general but also the precise footprint on which your upright fridge will be stored. That means giving something like 10cm all the way around the fridge, just to be on the safe side.

WHAT IF YOU DON’T?: Giving your stored fridge some air to breathe gives it some space from stale air, potentially damp walls and moisture, damage from abutting nearby objects and the risk of mould and condensation damage.

Store your fridge right with Jim’s help

Did you know the friendly team at Jim’s Self Storage care about each stored fridge at our specialised Williamstown facility? Protect your valuable fridge’s functionality, performance and lifespan by putting it in our hands – ensuring 24/7 security, ideal conditions and prices you can afford. If you are near Altona, Newport, Laverton, Point Cook, Werribee and anywhere in Melbourne’s Western Suburbs and looking for a hassle-free experience in storing your fridge and turning it back on again once it’s at its next destination, have a chat with Jim’s Self Storage today.

packing storing fragile items
Articles

Tips for Packing & Storing Fragile Items Safely

packing storing fragile items

Fragile items require special care when it comes to storage. Whether it’s a delicate piece of china, a prized collectible, or a sentimental family heirloom, these items are often irreplaceable and need to be treated with the utmost care to avoid damage. If you have fragile items that you need to store, it’s important to take the necessary precautions to ensure that they are safe and protected.

In this blog post, we’ll explore some tips and best practices for storing fragile items to help you keep them in good condition for years to come. We’ll cover preparing, packing and storing fragile items at home or in a storage unit near you.

Preparing fragile items for storage

Before you start packing your fragile items, it’s important to do some preparation to ensure that they are ready for storage. First and foremost, you should make sure that your fragile items are clean and dry. Any dirt or moisture on the surface of the item can lead to damage over time, so be sure to give your items a thorough cleaning before you start packing them away.

Once your items are clean and dry, it’s time to assess their condition. Take a close look at each item and look for any cracks, chips, or other imperfections that could potentially cause problems during storage. If you find any damage, it’s a good idea to have it repaired before you begin packing. This can help prevent further damage and ensure that your fragile items are in the best possible condition when you go to retrieve them from storage.

Packing fragile items for storage

Once you’ve cleaned and assessed the condition of your fragile items, it’s time to start packing them. The key to successfully storing fragile items is to use proper packing materials to protect them from damage. Some of the best materials for packing fragile items include:

Bubble wrap

Bubble wrap is a great choice for protecting fragile items during storage. Its cushioned surface provides a layer of protection against bumps and impacts, making it ideal for protecting delicate items like china and glassware. When using bubble wrap, be sure to wrap each item individually and use enough bubble wrap to fully cover the surface of the item.

Foam sheets

Foam sheets are another great option for protecting fragile items. They provide a soft, cushioning layer that can absorb impacts and prevent damage. When using foam sheets, be sure to cut them to size and wrap them snugly around your items to provide maximum protection.

Packing paper

Packing paper or butchers paper is a versatile material that can be used to protect a variety of different items during storage. It’s soft and pliable, making it easy to wrap around delicate items like figurines and vases. When using packing paper, be sure to wrap each item individually and use enough paper to fully cover the surface of the item.

Moving Boxes

Boxes are an essential component of any packing project, and they can be especially useful for storing fragile items. When selecting boxes, be sure to choose ones that are sturdy and have enough room to allow for proper cushioning around your items. Ideally buy moving boxes online or from your storage facility. Avoid overloading boxes with too many items, as this can increase the risk of damage during storage.

Storing Fragile Items Safely

Once you’ve packed your fragile items, it’s time to consider where to store them. The best place to store fragile items will depend on a variety of factors, including the type of items you are storing, the length of time they will be in storage, and the available space in your home or storage facility. Some tips for storing fragile items include:

Avoid extreme temperatures

Extreme temperatures can be harmful to many fragile items, so it’s important to store them in a place that is relatively cool and dry. Avoid storing fragile items in attics or basements, which can be prone to temperature fluctuations, and opt for a climate-controlled storage unit instead.

Keep items off the ground

If possible, try to store your fragile items off the ground. This can help protect them from water damage, pests, and other hazards. If you need to store your items on the ground, be sure to use pallets or other elevating materials to keep them off the ground.

Use storage bins

Storage bins are a great option for storing fragile items. They provide an extra layer of protection against dust, dirt, and other potential hazards, and they can be easily stacked to save space. When using storage bins, be sure to label them clearly and stack them in a way that will minimise the risk of damage.

Consider humidity

Certain fragile items, such as wooden furniture and musical instruments, are sensitive to changes in humidity. If you are storing these types of items, be sure to choose a storage unit or location that has a consistent humidity level. You can also use humidity control products, such as silica gel packets or dehumidifiers, to help maintain a stable humidity level in your storage space.

Here’s a few more tips for storing fragile items.

Wrap Your Glassware in Layers

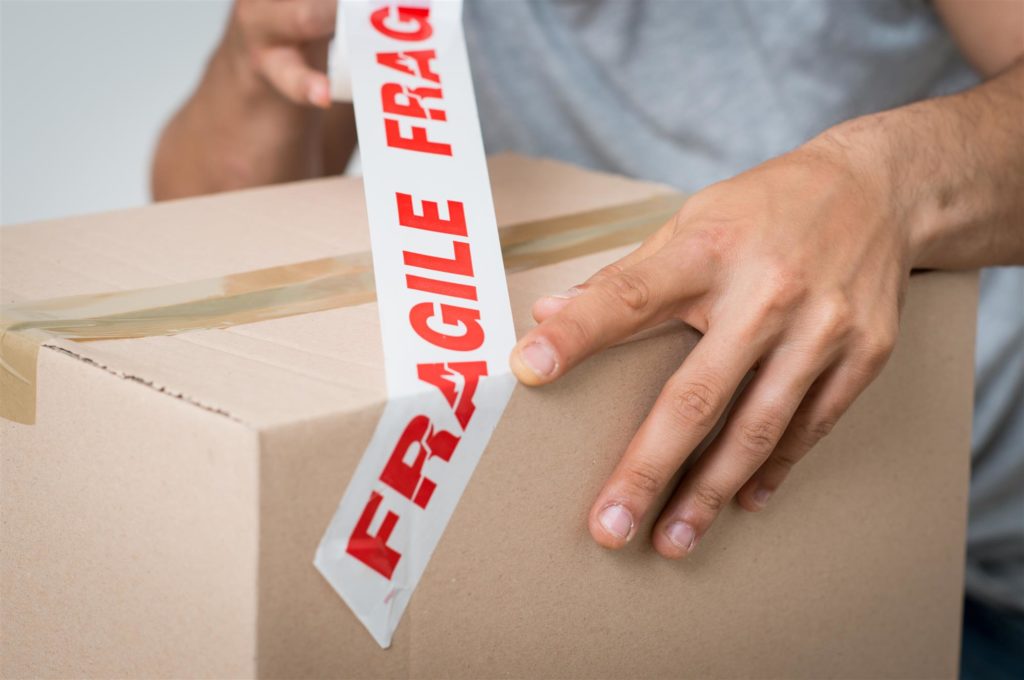
Your glassware and ceramics will be your most sensitive items. You should use layers if you want to protect these items fully. You should place newspaper, styrofoam, or another type of filling in the middle of your cups and glasses. Next, you’ll need to make an outside protective layer for these items using newspaper or bubble wrap. Tape the outside protective layer to the items, and then stack them into a box that fits their shape precisely. Place bubble wrap or an alternative filling into the box where you find any leftover space. Tape the box shut and label it “fragile” so you remember to take special care when you move it.

Put Heavy Items Down Below

Heavy, sensitive items such as televisions should be placed at the bottom of your self storage unit. You should place a hard layer over the screen before you place it into a box. Cardboard is an excellent protective cover for the screen if you don’t have the original box for the television. When placing the television in a box, be sure to put styrofoam or bubble wrap on the bottom and sides of the box to protect the unit.

Store Fragile Items on Top

All of your light, fragile items should be stored on top of the heavier items. This will ensure that nothing crushes them if your wall of stored items falls as you’re packing everything away. Again, you’ll need to make sure you label everything that can easily break so you and your helpers will know to take special care of the items.

Wrap Paper Items in Plastic

The chances are high that you will have a lot of important paper documents that need to go inside the Self Storage Yarraville. You must take special care when you store those items because they can deteriorate if moisture hits them. Make sure you purchase air-tight plastic bags that you can put the documents into. The plastic will prevent the air and moisture from hitting your documents and destroying them.

Put Small Items in Plastic Containers

You may also have small, fragile items such as ceramic trinkets, salt and pepper shakers, light bulbs, electronics. It would be wise for you to wrap these items inside of bubble wrap individually and then protect them even further by placing them into a plastic box. Put some packing peanuts in the bottom of the box and then fill the box up strategically so that none of the small items move around when you move the box. Mark fragile on the lid so you know to handle the container carefully and place it on top.

Wrapping up!

Storing fragile items requires a bit of extra care and attention, but by following these tips and best practices, you can help protect your valuable and sentimental items from damage during storage. Whether you’re packing up your home for a move or simply need to clear out some space in your home, following these guidelines can help ensure that your fragile items remain safe and protected until you are ready to retrieve them.

If you need a safe space to store the fragile items you care about, small and large storage units are available at our award winning Williamstown storage facility in Melbourne’s west. Choose a storage unit size that’s just right for your needs from as small as 1m x 1m so you only pay for what you need.

boat ramps near williamstown
Articles

The 4 Best Boat Ramps Near Williamstown

boat ramps near williamstown

Since when do you need a good excuse to jump aboard a boat? Whether you fancy a fresh Snapper or two for dinner, a lungful of that fresh salty air or just some good ol’ camaraderie with family & friends, you may well be planning a trip to your local boat ramp at this very moment. But where to go? Melbourne is a big place, there are plenty of great boat ramps to choose from, and it can be difficult to separate the wheat from the chaff.

Here at Jim’s Self Storage, we love boating too! In Melbourne, our western suburbs self storage facility is just a stone’s throw from two excellent boat ramps near Williamstown – one between the Yarra and the Williamstown Wolves baseball club, and another just over at Altona Beach. It’s therefore no surprise that we put a lot of thought into our conveniently located boat storage services, providing 24 hour access, an alarmed yard, private boat spaces and an on-site resident manager.

So before backing that trailer down to low tide at either Williamstown or Altona, let’s run through 2 more local boat ramps that we’d heartily recommend – for a total of 4 – scattered around the beautiful waters surrounding us near Melbourne:

1. Williamstown Boat Ramp

Just around the corner from us, and less than 7kms from the city, this is the perfect spot to launch the boat or kayak. Often called the Newport ramp by locals, it can get fairly busy so aim for an early start. But it will also be worth the wait for its access to the Marrybinong estuaries, and you’ll even get your small craft all the way to Flemington if you fancy.

2. Altona Boat Ramp

Also a stone’s throw from us here on Kororoit Creek Rd, the Altona spot is just 11kms from the CBD – and a perfect spot if you fancy some salmon or flathead. You can put the boat, tinny or kayak in the water here with easy access from the Western Ring Road, and launching a boat and parking your car is free. Try the waters out to Hobson’s Bay, or join those who anchor nearby targeting Whiting and pinky snapper – and maybe even try your luck for some squid by heading out towards Point Cook.

3. Werribee South Boat Ramp

We’re always surprised how many of our clients say they take their boats for a 30-minute trek out to Werribee South. Some say the facility here needs some work, but it’s a great alternative for something a little less busy, thanks in part to the six separate ramps. Parking here is great even if the toilets leave something to be desired, but just a few minutes offshore you’ll be pulling whiting and even squid out of the water – and gunny sharks for those a little more adventurous.

4. St Kilda Boat Ramp

Head 30 minutes away from us in the other direction, meanwhile, and you could be launching from St Kilda. It’s part of the impressive Marina Complex out there, and the ramp itself is in pretty good nick. Those with deeper hulled vessels will be happy here, and it’s one of Melbourne’s prime spots for snapper in the summer.

Choose Jim’s Self Storage for your boat storage

Want to know more about what Jim’s Self Storage here in Williamstown can offer you in terms of premium, secure, convenient and affordable boat storage? Your pride and joy and all your expensive gear will be in the safest possible hands before you head out to Newport or Altona and beyond, so get in touch with Jim’s friendly team today to discover more.

document storage melbourne
Articles

5 Key Steps For Secure Document Storage

document storage melbourne

What do the Magna Carta, Declaration of Independence, the Bill of Rights and the Treaty of Versailles all have in common? Answer: They were documents that changed the world for the better. Even within your own business or personal affairs, however, there are documents that are no less important to you – registrations, certificates, licenses, certifications … your map to hidden treasure, with X marking the spot. No matter what document we’re talking about, there may come a time when it’s not needed every day, or even every year or 5 years – but you definitely still need a place to keep them out of your way, safe, sound, secure and protected. So how exactly do we go about storing documents in the smartest ways?

These document storage tips should get you started:

1. Organise

Storing documents in the safest and sound manner starts with good organisation. For instance, if only 1 document in a stack of 100 is really worth saving, then why bother storing all of them? It may well be that unimportant documents to you are like gold to an identity thief or scammer, so you’re better off tidying up your affairs by destroying them rather than keeping them.

2. Filing/labelling

With the wheat separated from the chaff, it’s time to file and label. Remember, you won’t see these documents for some time, so a deliberate filing system specifically for storage is a very good idea. The easiest way to do this is with document archive boxes (easily purchased from a box shop in Melbourne), which are specifically designed for storing and relocating logically organised and clearly labelled and filed documents.

3. Moisture protection

Good storage conditions are controlled for humidity and moisture, which is especially important for sensitive records that are more prone than others to damage including from mildew growth. For similar reasons, you can even protect your documents from fire damage with special airtight and flame-resistant containers.

4. Off the floor

The riskiest place to store your documents is at floor level, opening them up to pest and flood damage. Once on the shelf, adequate ventilation should be accounted for by allowing space and airflow around the stored items, and dust protection can be provided with a cover.

5. Storage facility

While it can be just as handy to store your documents in the shed or ceiling space, a much smarter option is to put it in the hands of a truly professional self storage facility with a space that is perfectly optimised for the purpose. Check for specifics including:

  • Security features/policies
  • Physical measures (lighting, fencing, gates, locks)
  • Advanced measures (in-person surveillance, video/motion monitoring)
  • Accessibility (24 hour access?)
  • Pricing packages
  • Unit sizes/specifications/environmental control.

Storing documents? Jim’s can help today

If you’ve run out of space for your business storage needs, or you require something more safe and secure to keep your most prized documents or other business and personal information or items, Jim’s Self Storage is the wisest option in and around Williamstown and surrounding suburbs including Brooklyn, Altona North, Altona Meadows, Altona, Yarraville, Footscray and beyond. With over 900 units, our award-winning facility is safe, clean, convenient and secure, so get in touch for a chat with the friendly team at Jim’s Self Storage today.

warehouse storage solutions
Articles

Warehouse Storage Melbourne: The Smart Alternative!

warehouse storage solutions

Anyone who has tried to run a business knows all too well that there really aren’t any secrets to success. With so many businesses headed for demise in the first few years of operations, those who make the grade insist that a great product or service, a clear business plan, the right people, industry and financial knowledge and effective advertising are an absolute must. But do you know what else is crucial? It’s out-of-the-box thinking. So let us ask you this: If your business involves the need for storage, have you considered a more efficient approach to traditional warehouse storage?

Thankfully, even if you haven’t considered that there may be cheaper alternatives to traditional warehouse storage Melbourne wide, there are those who have … like us! In fact, businesses using self storage facilities as a smarter alternative to using warehouses and other traditional commercial storage solutions is a major growing trend, so let us assure you – if you’re thinking of heading down that road, we’re right there with you.

Self storage facilities are one of the very best commercial storage solutions, perfect for:

  • Small to medium-sized operations
  • Small online-based e-commerce businesses
  • Tradies with equipment & supplies
  • Those transitioning from office to home-based work due to Covid-19.

In many cases, self storage as an alternative to long and short-term warehouse storage actually has many benefits over the traditional and much more expensive options:

1. Cost savings

Some warehouse storage options focus on the space rather than the extras … like connecting power and other basic utilities. Instantly, a world of cost saving opportunities opens up if you no longer need the associated headache and costs. Because you can scale up or down your self storage space to suit, there’s no wasted money on unused warehouse space.

2. Security

Similarly, signing a lease for warehouse storage Melbourne wide will often leave a business having to organise everything else – like security for their precious belongings. With self-storage, though, one of the major perks is that it’s locked up and monitored like Fort Knox.

3. Controlled environment

For many businesses, the ‘climate’ of the commercial storage solution is key. For instance, a business in the electronics game needs the environmental conditions to be ideal – no dampness, no extreme temperatures, and the like. With self-storage, that’s all taken care of.

4. Short or long-term

Often, a business will have to load up their budget so much with short-term warehouse storage that it endangers the prospect of profits from the get-go. Self storage, though, is so flexible that it can be used for short term warehouse storage without having to commit yourself to a long lease.

5. Location

When it comes to traditional warehouse storage, let’s face it: the options in front of you can be tucked away in some of the worst, least secure and remote parts of Melbourne. Self storage facilities, are typically located right in the business hubs in secure, central and domestically and commercially bustling areas.

In fact, our storage facility is conveniently located for Altona MeadowsLavertonYarravilleHoppers Crossing, Brooklyn and most of the western suburbs.

Use Jim’s Self Storage as your warehouse storage solution

For so many small businesses, the issue of committing to long and expensive warehousing and other traditional commercial storage solutions can be make-or-break – with the emphasis on break. Have you considered turning self storage into a de-facto warehouse storage solutions for your operations? The dream of making a business succeed is close to our heart here at Jim’s Self Storage, which is why our business storage solutions can be as versatile as your needs and desires. Get in touch with the friendly team today to start exploring your options.

Storage tips during home-renovation
Articles

Tips To Make Home Renovations Easier

Taking on an independent home renovation project can be amazing. It can be something that’s free of unnecessary stress factors as well. If you’re going to be remodeling your residence all by yourself, there are various things that can assist you with the process in a big way.

There are so many things you need to consider when doing renovations. So the more you prepare for the project, the simpler everything should be for you. Tackling residential remodeling work can actually be a fulfilling and invigorating thing for anyone, so follow these tips from Jim’s Self Storage in Melbourne’s west to make your home renovation less stressful.

1. Home Renovation Costs

Making sure you are budgeting for your renovations is an essential part of the process.  It is difficult to pin down the exact cost, so you end up paying more than you budgeted for. The more you plan the more accurate your budget will be, so take time to create a renovation cost estimate before you start.

You also need skilled craftsmen who understand their jobs well and won’t make mistakes. Every mistake you make when renovating is extra costs at the end. Every extra material you use comes back to haunt you since you be paying for more. Without a comprehensive budget, you might find the costs are ballooning out of control. You also need to set guidelines for your renovations. You need to go into the process knowing exactly what you want so you don’t overspend.

2. Recruit the Assistance of Your Greatest Friends

Remodeling a home independently doesn’t mean you have to do so “alone.” If you want to make the project a lot easier, it can help you considerably to team up with your closest and most trustworthy friends. You can even think about recruiting your favourite family members. Assistance from other people can speed things up substantially. It can also be highly enjoyable. What can be more memorable than singing pop tunes together as you paint the living room walls a bright new colour?

home renovation help

3. Hiring the Right People

The most important part of doing renovations the right way is hiring good people. Without those people doing the job you will be stuck in purgatory. Your workers need to understand your needs in order to do the job well the first time. One of the worst parts about doing renovations is having a worker do something then doing it over because you didn’t like it. This happens often and it ends up adding to the cost. The considerable cost of doing renovations is only worsened by constantly changing things. To avoid all of this, you need to have a firm idea of what the finished renovation will look like. Without this firm idea, you will have a lot of struggle keeping on task and getting the job done in a reasonable amount of time and under budget. All of these things are essential to getting the work finished quickly and efficiently.

4. Look for Inspiration From Outside Sources

If you’re in an inspiration rut, then you don’t have to go into tantrum mode. That’s because you can always seek home remodeling inspiration from reputable interior design magazines. You can always seek inspiration on the Internet as well. There are all sorts of highly regarded websites that delve into the remodeling realm. These sites can teach you about widely known approaches to putting together family rooms. They can teach you about things you can do to update your basement, too. If you don’t want to waste time wondering how to approach your project, then there are all sorts of information options out there waiting for you. Be sure to explore them all exhaustively.

5. Forget All About Clutter

It can be unpleasant to renovate a home that’s disorganised. Lack of organisation can also get in the way of progress. If you want your renovation effort to go 100 percent smoothly, you should try to eliminate any and all clutter before you officially start your project. Lack of clutter can also lead to a space that’s both fresh and welcoming. Donate old furniture pieces that are simply taking up space. Throw out old bicycles and toys that you have no use for anymore as well. Remodeling a tidy space can make you feel like you can do anything in the world. It can free you of any and all restrictions and limitations, too.

If you don’t want to donate or discard clutter or belongings, then that’s completely fine because you can always opt for a storage unit from Jim’s Self Storage.  With 24/7 CCTV and other security measures plus the convenient location for renovation in Altona Meadows, Laverton, Yarraville, Hoppers Crossing and surrounding suburbs makes is an easy choice.

6. Storing Your Stuff with Self Storage

Finding great a great storage provider like Self Storage Altona will help you cut down on the price of things. For example, you can store your tools when you are finished using them. For most renovation jobs, you will also need to store furniture and other items from your home in a place you can trust. Whether you want to store the contents of your entire home while you renovate, or the contents of one room while you just renovate your kitchen or master bedroom, there’s a storage unit size for you.

Getting proper storage is one of those things that might not spring to mind for people new to renovating but is essential to the whole process for doing renovation work. Storage also allows you to organise your items in one place so you don’t lose them. One of the worst things that can happen is doing the job and then not finding the tools you need when you need them. By keeping everything organised in this self storage unit, you can easily find it whenever you want.

Tips for Living in a Home During Renovations

Several years ago, I underwent a massive bedroom and kitchen renovation project. What that meant is that I wasn’t able to sleep in my bed or wash dishes for approximately 3 months. Did I choose to spend money at a hotel while this happened? No. If you are contemplating the possibility of staying home while you undergo a renovation project this is for you. In this guide I provide some tricks and tips to help you live in a home undergoing a renovation project.

7. Precooked Meals

If you’re having your kitchen renovated it goes without saying you won’t be able to access it. Unless you want to wash your dishes in the sink, you should consider buying precooked and fully cooked, yet frozen meals. By doing this, the only thing you will need is a microwave and a small refrigerator for you to enjoy your meals. Consider using plastic forks and plates to end the headache of having to decide where you can wash them safely.

8. Protect Your Pets and Children

If you have children and pets in your household, you need to let the contractor become aware that the safety of your children and pets is of the utmost priority. It will really be up to you and your spouse to ensure that you manage your children and pet’s prying hands and eyes. So, set some ground rules your kids need to abide by and be ready to enforce said rules. Ideally, you’ll want to keep your children and pets far from potential safety hazards associated with the projectYou should ensure you keep your living space thoroughly cleaned so that pets don’t get debris and chemicals all over them.

9. Spray the Dust

There’s a high probably that your home will experience an influx of sawdust as the contractors work away. At the end of every day, you may notice dust residue in various sections of your living area. Brooming and vacuuming this type of dust can prove to be difficult and may cause it to become airborne and subsequently spread throughout your homeBut, by using a fine mist spray pump to spray the affected area, you are essentially eliminating the possibility that it will fly away once you start to clean it up.
Finally, after going through months of stress and anxiety with the ups and downs of renovation, you will realise that it was all worth it! After the final touch is installed and your house becomes a home, you will breathe a deep sigh of relief knowing your family now has a safe and gorgeous home to live in. Renovating your home for lifestyle or selling at a profit is a worthy cause. Hard work with reward. We hope these home renovation tips make it a smoother and easier process for you!
moving to melbourne's western suburbs
Articles

Our Guide To Moving To Melbourne’s Western Suburbs

moving to melbourne's western suburbs

Melbourne has had a rough ride lately, but we still think it’s one of the best places on Planet Earth to live. Forget the lockdowns, forget the recent rantings of the mainstream media – Melbs remains effortlessly cool and the housing market isn’t just back on track, it’s just raced past its pre-pandemic highs.

You wouldn’t be silly, then, to be considering a move to Melbourne – not at all. And do you know what? The west is the best. The western suburbs, to be more precise. Altona, Altona Meadows, Brooklyn, Footscray, Yarraville, Laverton, Hoppers Crossing – the list goes on and on. Not too far from the CBD but so much more affordable than the inner north or east, the western suburbs are pristine and the population, infrastructure and amenities are booming.

Are you going to give the west a shot? You might need some advice on moving to Melbourne’s western suburbs, then!

how to stage home for sale
Articles

9 Easy Ways To Stage Your Home For Sale

how to stage home for sale

If it’s time to sell your home, you want to get the best price possible. The market conditions, neighbourhood and size of your block might not be in your control, but one key aspect is. First impressions. Thinking about how to stage your home for sale can add a healthy amount to the final sale price and also get it sold faster.

In a nutshell, good home staging means your house is not presented exactly how you may want to live in it, but it looks and feels exactly the way that makes buyers want to buy it!

Luckily, it’s not rocket science. Here’s what to do:

1. Fix the little things

While you may be happy in your humble abode, it’s the little things that can miss your attention when it comes to moving on.

We’re talking about those little scuff-marks on the wall or that leaking bathroom tap that you’ve learned to live with. They may be the little things, but they can be a big deal when you’re trying to make a good impression.

2. Get rid of the clutter

One of the easiest ways to turn off a buyer when they’re sussing out your place is to clutter their mind with … your clutter!

Not just that, if every cupboard and storage space is overloaded with your junk, you may create the impression that storage is an issue with your house. So do yourself a favour and contemplate spending a few dollars on a some short term self storage in Melbourne.

3. Highlight the selling points

The basics of your house may have some downsides, but at the very least you need to be highlighting the really good things about living where you live.

So if you have great lounge room windows that really let in that afternoon light and warmth, consider removing the huge drapes that hide them away. If the whopping great counter tops in your kitchen are going to excite a particular buyer, make sure they’re not cluttered with appliances and junk that might find a better place for the time being in storage.

4. Prepare the rooms ideally

You shift into a higher price bracket if your house has particular basic features – like a fourth bedroom or a second bathroom.

So if that fourth bedroom is actually your ‘spare room’ and you’ve filled it with unused junk like piles and piles of clothes as well as an exercise bike, you really need to consider putting it all in storage instead. Then, think about filling that new space with a bed and a couple of side tables.

Similarly, if your second bathroom is unused and neglected, spruce it up so that it’s not obvious that you really can live with just a single bath or toilet.

5. Arrange Your Furniture

It would be best if you consider rearranging your furniture to give the best look to viewers. Create walkable space to ease the movement making the house seem more spacious. If furniture is in the way or not adding to the appeal, refer to step 2!

6. Make the personality ‘neutral’

All too often, what turns off a potential buyer is a home decoration ‘personality’ that doesn’t match their own.

That’s because everyone has their own taste – and your gaudy colours and brash furnishings could turn off rather than impress the perfect buyer. On the other hand, neutral colours and basic decorations and furniture will appeal to most, so think about getting out that paint brush and sending some of your more unusual furniture to storage. You can even rent furniture for home staging.

7. Consider the lighting

It would be best to avoid darkness filling your house while the buyers familiarise themselves with the home. Consider opening the blinds of the windows to let light fill the rooms. Additionally, you may opt to put more lamps and make sure that the lights are on throughout the walk.

8. Ensure Freshness

One significant way to ensure that bad odours are no more in your house is by a thorough cleaning. Ensure that areas such as the kitchen and bathroom are appealing to the buyers. Empty dustbins and ensure that all corners create an excellent impression to the buyers.

Alternatively, you can put some sweet-scented flowers in different areas of the house. The flowers you choose should be fresh, providing a conducive environment for all.

9. Focus Where it Counts

In every house, buyers focus more on some rooms that interest them. If it’s a house they want to live in, lay more emphasis on the table room and also master bedroom. The kitchen is also another area you should utilise more time decorating it. Remember, home staging can be expensive, but if you apply smart tips, you will spend less and achieve more.

Making your house look nice is always on the list of things for a seller to do. But thinking about how to stage your home for sale in the most professional way is actually a big trend that is really converting into the highest prices and fastest sales right now. Can you think of any other simple tips for staging homes? We’d love to hear your thoughts!

Choosing self storage to hide away items and get better price for your home? We are conveniently located in Williamstown for AltonaNewport, Laverton, YarravilleKingsvilleFootscraySpotswood, and surrounding western suburbs.

Screen-Shot-2018-11-06-at-10.54.30-am
Articles

The DIY Guide to Self Storage Planning & Preparation

Whether you are moving house, traveling or relocating your business, there are many times where you will need to store some of your items. A self storage unit is a great solution to this problem.

However, a poorly planned self storage unit where you items are not prepared properly can lead to headaches when accessing your items and can even eventually cause damage to your stored goods.

Our self storage guide is for planning and preparing your items for self storage, and can help avoid some of these issues. If you’re wondering how much self storage space you might need, head over to our storage space calculator.

self storage planning infographic


“The DIY Guide to Self Storage Planning & Preparation” Infographic Transcription

Whether you are moving house, traveling or relocating your business, there are many times where you will need to store some of your items. A self storage unit is a great solution to this problem. However, a poorly planned self storage unit where your items are not prepared properly can lead to headaches when accessing your items and can even eventually cause damage to your stored goods. Our guide to planning and preparing your items for self storage can help avoid some of these issues.

PREPARING YOUR ITEMS

The use of Packing accessories such as Cartons, Porta Robes, Paper, Tape, Bubble-wrap and Plastic covers will maintain and protect your goods whilst in storage.

Fill Cartons to capacity; partially full or bulging Cartons may tip or collapse. Heavy items like books or tools should be packed in small Cartons so they are easy to handle. Books should be packed flat, not on their spines. Packing and labeling Cartons room by room makes the unpacking much easier, and if you need to find something in storage you will have some idea of which ca on to begin looking in.

WHITE GOODS & APPLIANCES

CLEAN & DRY WHITE GOODS
Fridges, freezers and other white goods should be thoroughly DRY and CLEAN before storing. A dirty or wet fridge or microwave can lead to an unpleasant odor that will seep in to other items, especially cushions, pillows and linen.

LEAVE DOORS SLIGHTLY AJAR
Whilst in storage the door should be secured slightly ajar. A deodorizer placed inside fridges or freezers is also a good idea to maintain freshness. Don’t place items inside fridges or freezers as the shelves and linings can be easily marked and damaged.

FURNITURE

DISASSEMBLE FURNITURE
Where possible, disassemble furniture and place all pieces in a box with assembly instructions. Tape any loose screws on to the inside of the box. This way you will ensure that you have everything in one place when you need to reassemble the item.

CLEAN FURNITURE BEFORE PLACING IN STORAGE
Clean all furniture thoroughly before storing. Use a sheet or tarp to cover large pieces of furniture and keep it clean. A sealed bag is a good solution to protect pillows and cushions.

PROTECT FRAGILE PIECES
Use bubble wrap to protect fragile arms/legs of furniture from scratching and denting. Use the padding (cushions/pillows etc) from furniture for extra protection.

ELECTRONICS

STORE SIMILAR ITEMS TOGETHER
When packing your smaller electronic items, try to put all like items in one, clearly labeled box. Pack instruction manuals and cords with their original electronics. This will ensure that these bits and pieces are easy to find.

PACK ITEMS PROPERLY
The original boxes for electronic items are ideal to repack in. If this is unavailable, wrapping items individually in bubble, packing them in Cartons, and sealing the top will offer protection for your electrical items. It is best to remove any batteries from remotes and toys to avoid damage from leaking batteries.

DOCUMENTS AND ART

LABEL AND ORGANIZE ALL DOCUMENTS
There’s no use wasting space with unnecessary documents. So shred documents that aren’t needed and organize them in to clearly labeled boxes. Tabbed folders are a great way to organize all of your documents.

CHOOSE THE RIGHT STORAGE SOLUTION
Business records and documents containing sensitive personal information should be stored or disposed of securely. Consider using water proof lockable boxes for these types of documents.

FRAMED ARTWORK
Protect the edges of frames by covering the corners in cardboard. It is also a good idea to wrap the whole thing in cloth or paper to add moisture protection. Finally, add a layer or two of bubble wrap to ensure that both frame and picture are protected from bumps and scratched.

PLANNING

It is important to plan the layout of your self storage unit so that you all of your items can not only be accessed with minimal fuss when/if you ever need them, but also in a way that protects them from moisture/heat damage. With this in mind, below are a couple of ways you can achieve this with simple planning.

CREATE A CENTRAL AISLE
Leaving a central aisle down the center of your storage unit with small interval walk ways allows for easy access to all of your items.

LEAVE SPACE BETWEEN THE WALL
Leave a small gap between the wall of your unit to allow for air flow. This helps to prevent moisture and heat damage.

LAY A SHEET OR TARP ON THE FLOOR
Laying a tarp or plastic sheeting down before you pack your unit will help avoid condensation damage.

STORE FREQUENTLY USED ITEMS IN THE FRONT
This allows for easy access to items that you are likely going to use.

Home gym
Articles

Building a Home Gym on a Budget

Home gym

If you’re looking to stay healthy and fit, it’s important to build a home gym. It’s not hard to build your own gym, and you can even free up space for it by renting a small self storage unit. The best part is you don’t have to spend an arm and a leg on your gym. The following guide can help you build a home gym without going over your budget.

To help increase your motivation for this project, here are three reasons to consider a home gym:

Works for your Schedule

It’s not easy to make it to the gym when you’re working long hours or taking care of your household. You may find yourself neglecting your workout routine. What you need is a gym right inside your own home. This way, you can work out around your schedule. You don’t have to worry about driving to the gym or keeping up with a membership.

You Can Work Out in Private

If you’re like many other individuals, you’re not a fan of working out in front of other people at the gym. You may not like the feeling of being watched as you exercise. A home gym gives you the privacy you need when getting in your daily workout. You can even close the blinds or build the gym in your basement.

Allows you to Focus

The lack of focus is another drawback of working out in a gym. There may be too many people nearby to focus on your work out, or you may find the constant noise that comes with some equipment to be irritating. When you work out at home, you can focus on your own exercise routine.

You have finally created enough space for your home gym by placing some items in your self storage unit. The next step is to figure out how to build your home gym on a budget.

Start with the Basic Equipment

You can build a home gym for under $1,000 by sticking with the basic equipment for losing weight and gaining muscle. Invest in a jump rope, weight plates, Olympic barbell, flat bench and a squat rack with a pull-up bar. You don’t need to spend another $1,000 to add a state-of-the-art machine to your home gym.

Keep it Simple

If you cannot afford the above equipment right now, you can always start with simple items such as a balance ball, dumbbells and resistance bands. In addition, you can also add in a yoga mat, elastic pull rope and push up bars for an affordable price. You can invest in equipment of different sizes and weights without breaking the bank.

Switch your Equipment as Needed

You can change things up a bit by trading your equipment between your home gym and self storage. This way, you don’t have to worry about buying additional equipment out of boredom. If you would rather keep all of your equipment in your home gym, you can create more space by placing additional items into your storage unit at Jim’s Storage Williamstown.